 Save to Pinterest
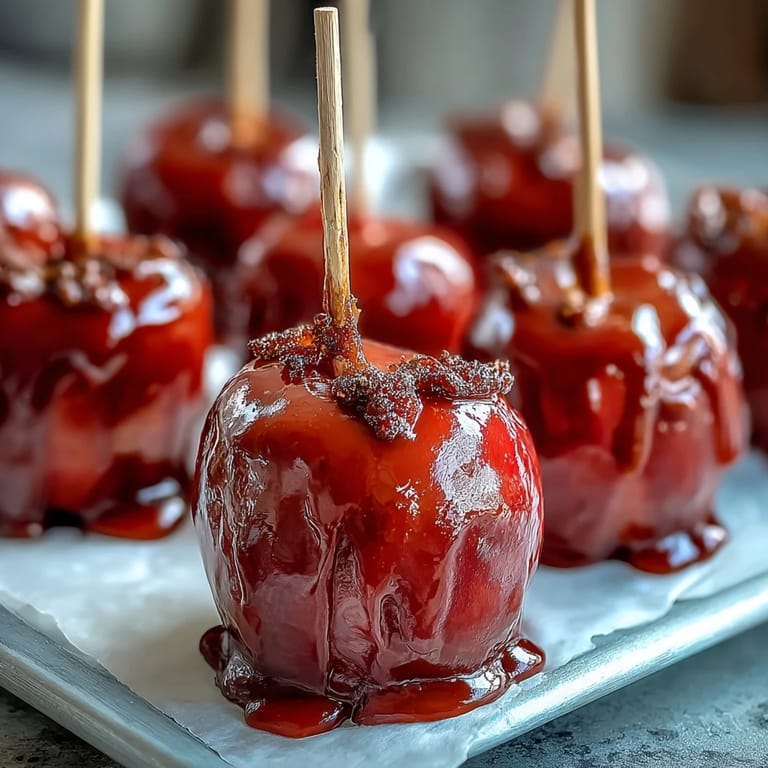
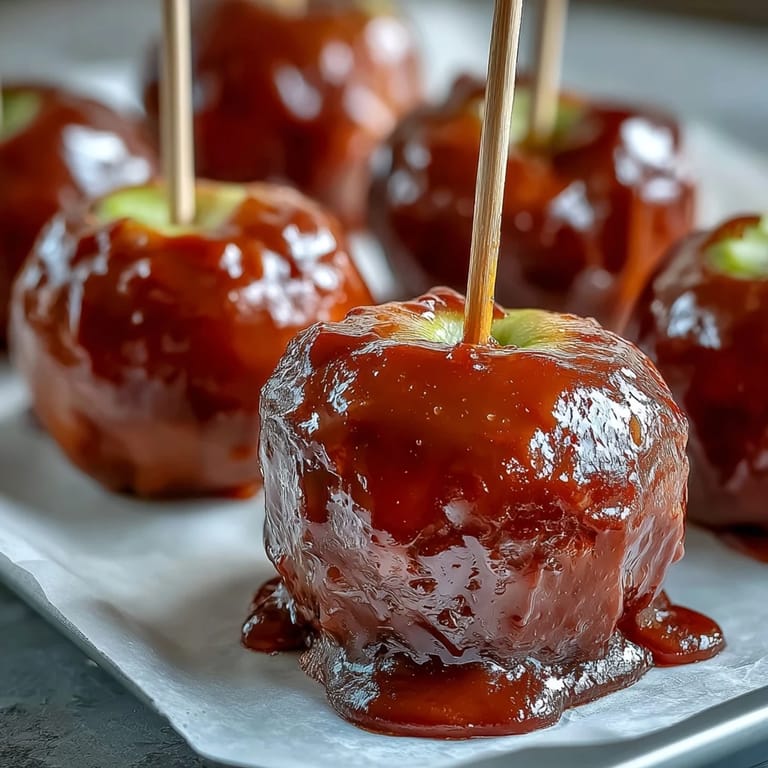
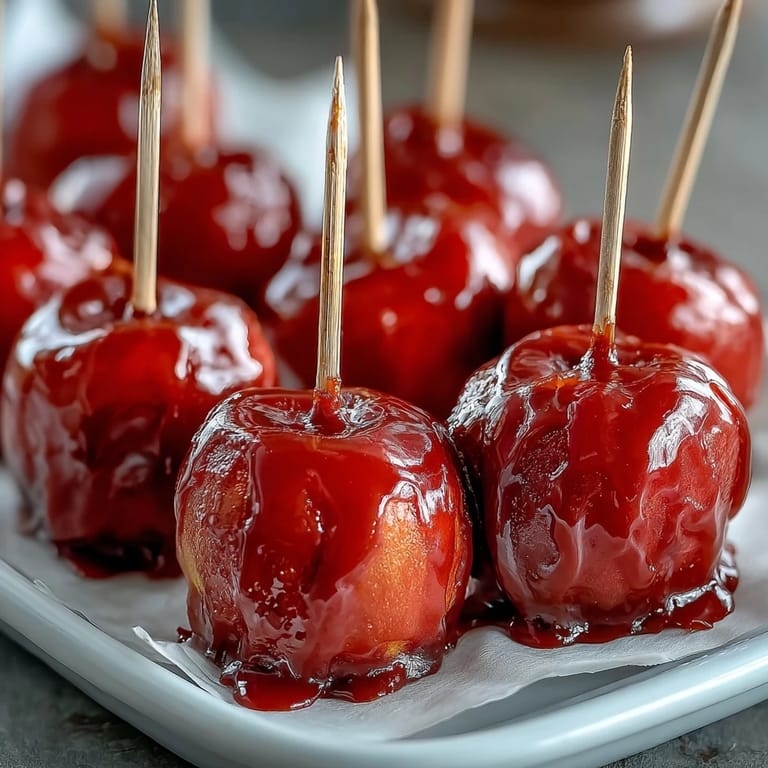
 My neighbor threw a last-minute holiday party, and I showed up with store-bought desserts until she casually mentioned her kids were tired of the usual cupcakes and cookies. Something clicked, and I remembered my grandmother's old trick of turning simple apples into glossy, jewel-like candies on sticks. Twenty minutes later, I was pulling these shimmering bites off parchment paper, and watching them disappear faster than I could make them told me everything I needed to know.
I made these for my daughter's school fundraiser, and a parent actually asked if I was selling them professionally. The moment she tasted that first crunch and bit into the apple beneath, her eyes lit up in a way that made every sticky finger in the kitchen worth it.
Ingredients
- 2 large crisp apples (Granny Smith or Fuji): The tartness cuts through the sugar brilliantly, and firm varieties hold up to the hot coating without getting mushy or browning quickly.
- 1 cup granulated sugar: This is your base for that glass-like shell, so don't substitute with honey or brown sugar or you'll end up with something chewy instead of crispy.
- 1/3 cup light corn syrup: This prevents crystallization and keeps your candy smooth and glossy rather than grainy and dull.
- 1/4 cup water: Just enough to get everything dissolved before the heat does its magic.
- 1/4 teaspoon red food coloring: Use gel coloring if you have it, as it won't thin out your syrup the way liquid coloring can.
- Nonstick cooking spray: A light mist on parchment prevents sticking without adding moisture that ruins the hard candy finish.
- Optional toppings: Chopped nuts, mini chocolate chips, or sprinkles go on while the coating is still tacky, so timing is everything.
Tired of Takeout? 🥡
Get 10 meals you can make faster than delivery arrives. Seriously.
One email. No spam. Unsubscribe anytime.
Instructions
- Set up your station:
- Line a baking tray with parchment paper and give it the lightest mist of nonstick spray so your finished bites won't cement themselves to the paper. Having everything within arm's reach before you start cooking is non-negotiable because once that candy hits temperature, you're racing the clock.
- Prepare the apples:
- Wash and dry them thoroughly, then core and cut into roughly 1-inch chunks, patting each piece completely dry with paper towels because any moisture is candy coating's worst enemy. Insert a toothpick into each piece and line them up on a small plate, ready to go.
- Combine and heat the coating:
- Pour sugar, corn syrup, and water into your saucepan and stir just until combined, then set it over medium-high heat. Once it starts boiling, resist every urge to stir it or the whole thing will crystallize into a grainy, unusable mess.
- Reach hard crack stage:
- Clip your candy thermometer to the side of the pan and watch it like a hawk until it hits 300°F, which usually takes about 7 to 8 minutes. At this exact moment, pull it off the heat immediately and stir in your food coloring until it's evenly tinted.
- Dip with speed and grace:
- Working quickly because the coating hardens as it cools, grab each apple chunk by its toothpick and swirl it into the candy coating until completely covered. Let the excess drip back into the pan for a few seconds, then place it on your prepared tray in a single layer.
- Add finishing touches instantly:
- If you're using sprinkles, nuts, or chocolate chips, scatter them on immediately while the coating is still tacky because they won't stick once it hardens. You have maybe 30 seconds of working time before this window closes.
- Cool and set:
- Leave everything untouched at room temperature for at least an hour, resisting the urge to poke them or move them around while they solidify.
 Save to Pinterest
 I once brought these to a potluck where someone's grandmother looked at them suspiciously, bit into one, and then ate three more in a row without saying a word. Sometimes food just becomes a tiny moment of pure joy, and these little red gems do that consistently.
The Science of the Candy Coating
That hard crack stage at 300°F isn't just random chemistry talk, it's the exact temperature where sugar molecules link together into that satisfying glass-like shell. If you undershoot and stop at 270°F, you'll get a chewy coating that sticks to your teeth, and if you overshoot past 310°F, the whole thing turns brittle and shatters when you bite it. A candy thermometer isn't optional here because eyeballing it will lead to disappointment every single time.
Flavor Variations That Actually Work
Beyond the classic red coating, green food coloring gives you a crisp, almost poison-apple vibe that kids find hilarious. I've experimented with adding a tiny splash of vanilla or a pinch of cinnamon to the syrup before boiling, which adds complexity without overpowering the apple tartness. The real game changer came when I tried mixing in caramel coloring instead of red, which gives you a sophisticated golden-brown look that honestly looks more professional than the bright colors.
Storage and Make-Ahead Magic
These keep perfectly in an airtight container at room temperature for up to three days, making them ideal for prepping before parties. I've learned to store them in a single layer with parchment between them so they don't stick together, and I keep them away from humidity because moisture is the enemy of that glassy finish. A few last-minute thoughts before you dive in:
- Always use a fresh candy thermometer that you've tested beforehand because a faulty one will wreck your entire batch.
- If your candy hardens in the pan before you finish dipping, set it briefly over low heat to loosen it up again.
- Granny Smith apples are slightly more tart than Fuji, so pick whichever matches your personal sugar tolerance.
 Save to Pinterest
 These little bites have become my go-to move for when I want to impress without spending hours in the kitchen. There's something magical about turning three everyday ingredients and an apple into something that tastes like it came from a fancy candy shop.
Recipe FAQ
- → What apples work best for candy coating?
Crisp, firm apples like Granny Smith or Fuji hold up well and balance sweetness with tartness when coated.
- → How do I ensure the candy coating sticks properly?
Make sure the apple pieces are completely dry before dipping to help the candy adhere firmly.
- → Can I customize the coating color or flavor?
Yes, use different food coloring for color changes or add spices/essences to the candy mixture for flavor variations.
- → How should I handle the hot candy mixture safely?
Use caution when boiling the sugar syrup; avoid stirring after it boils and keep hands protected to prevent burns.
- → What toppings pair well with these bites?
Chopped nuts, mini chocolate chips, or sprinkles add appealing texture and additional flavor options.
- → What’s the best way to store these bites?
Keep them in a cool, dry place in an airtight container to maintain crispness and prevent stickiness.