Save to Pinterest
 My daughter discovered Cookie Run Kingdom during a rainy afternoon, and within days she was sketching cookie designs and asking if we could bake them together. I found myself drawn to the Milk Cookie character, intrigued by how something so whimsical could translate into actual baking. These delicate sandwich cookies turned out to be exactly what I needed that week, a quiet project that brought us closer while filling the kitchen with vanilla-scented warmth.
I remember pressing my palm against the dough balls and worrying I was being too rough, but my daughter grabbed a glass and showed me how gently you can flatten them without tearing. That small moment, her confidence in something I doubted, made these cookies mean more than just sugar and flour. We decorated the edges with rainbow sprinkles that evening, and they looked like little edible jewels sitting on cooling racks.
Ingredients
- All-purpose flour: Two cups give you the right structure for cookies that hold together without being tough, and measuring by weight instead of scooping prevents dense results.
- Unsalted butter, softened: Let it sit on the counter for about thirty minutes so it creams beautifully with the sugar, creating that light and fluffy base that makes these cookies tender.
- Granulated sugar: Two-thirds cup is enough sweetness without overpowering the delicate vanilla flavor, and it helps the cookies spread just enough to get thin and crispy edges.
- Large egg: This binds everything together and adds moisture, so use one at room temperature for even mixing.
- Milk: Two tablespoons keeps the dough soft and slightly moist, making it easier to work with and giving the cookies a gentle crumb.
- Vanilla extract: Use real vanilla if you can, because it makes a noticeable difference in how the filling tastes when you bite into it.
- Baking powder: Just half a teaspoon gives you a tiny lift without making them cakey, keeping them flat and delicate like the ones inspired the recipe.
- Salt: A quarter teaspoon enhances all the other flavors, especially if you use unsalted butter.
- Powdered sugar, sifted: One cup for the filling, and sifting it first prevents lumps that can make the cream grainy instead of silky.
Tired of Takeout? 🥡
Get 10 meals you can make faster than delivery arrives. Seriously.
One email. No spam. Unsubscribe anytime.
Instructions
- Set your oven and prep your stage:
- Preheat to 350 degrees Fahrenheit and line two baking sheets with parchment paper so nothing sticks and everything bakes evenly. This takes just a moment but makes cleanup so much easier.
- Combine the dry ingredients:
- Whisk together the flour, baking powder, and salt in a bowl, breaking up any lumps in the flour as you go. This distributes the leavening throughout so every cookie rises slightly and bakes consistently.
- Cream butter and sugar until fluffy:
- Beat them together for about two minutes until the mixture is pale and light, almost like clouds. You'll notice the color change and feel the transformation as air gets incorporated, which is what gives these cookies their tender texture.
- Add the wet ingredients one by one:
- Beat in the egg, then the milk and vanilla, scraping down the bowl between additions so everything combines smoothly. Don't rush this step, as taking a moment ensures the egg emulsifies properly.
- Gently fold in the dry mixture:
- Add the flour mixture gradually, mixing just until a soft dough forms without overmixing, which would make the cookies tough. The dough should feel pillowy and slightly tacky to the touch.
- Roll, place, and flatten:
- Roll the dough into one-inch balls and space them two inches apart on your prepared sheets, then use your palm or the bottom of a glass to flatten each gently to about quarter-inch thickness. This is actually meditative work if you let it be, and you'll quickly get a feel for how much pressure gives you even cookies.
- Bake until edges turn golden:
- Bake for ten to twelve minutes, watching for the edges to shift from pale to just barely golden while the centers stay soft. Pull them out when they look almost underbaked, because they continue cooking on the hot pan for another minute after you remove them.
- Cool completely before filling:
- Let the cookies rest on the baking sheet for a minute, then transfer them to a cooling rack. This step matters because filling warm cookies will melt the cream, so patience here pays off.
- Make the cream filling:
- Beat the softened butter until it's smooth and pale, then gradually add the sifted powdered sugar while mixing, followed by milk and vanilla extract. Beat until it's fluffy and spreadable, which usually takes about two minutes of steady mixing.
- Assemble the sandwiches:
- Spread or pipe about a tablespoon of cream onto the flat side of half your cookies, then top each with another cookie, flat side down. Press gently so the cream spreads evenly to the edges, creating those perfect sandwich cookies.
 Save to Pinterest
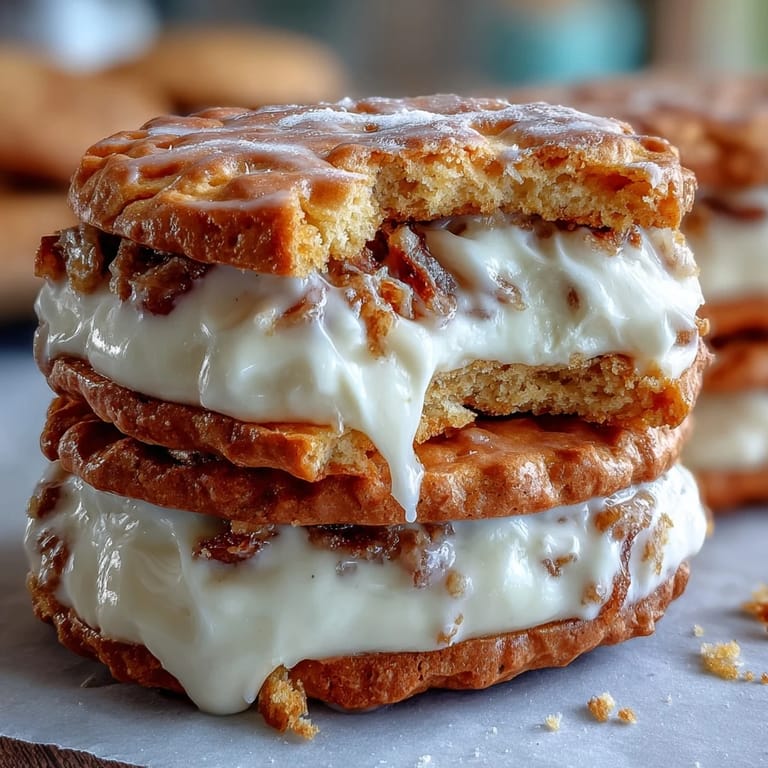
 There's something special about biting into a sandwich cookie and feeling the cream filling yield just slightly against your teeth, then the soft cookie dissolve on your tongue. My daughter declared these "exactly like the ones in the game" even though they're just simple vanilla, and somehow that made all the measuring and mixing feel like the most important thing I'd done that week.
Storage and Shelf Life
These cookies stay fresh in an airtight container for up to three days, though honestly they're usually gone by day two in my house. If you want them to last longer, store the unfilled cookies and assemble them just before serving, keeping the cream filling separate in the fridge.
Creative Variations Worth Trying
Once you nail the basic recipe, you can play with flavors without changing the technique much at all. Cocoa powder mixed into the dough creates a chocolate version, crushed freeze-dried strawberries add a subtle tartness, or a touch of almond extract in the filling brings something unexpected and lovely. The beauty of this recipe is its flexibility, so don't be afraid to experiment with extracts, sprinkles, or even a hint of lemon zest in the filling.
Why These Cookies Feel Special
There's something deeply satisfying about homemade sandwich cookies that store-bought versions just can't capture, whether it's the way the cream is still perfectly soft when you bite through the cookie, or the fact that you made every single layer yourself. These ones in particular remind me that sometimes the most meaningful kitchen projects come from unexpected places, like a video game obsession on a rainy day that turned into something real and shared and delicious.
- Always let your butter soften naturally at room temperature rather than microwaving it, which can separate the milk solids and make creaming less effective.
- If your cookies spread too thin during baking, your butter might have been too soft or your oven might be running hot, so chill the dough for fifteen minutes next time.
- Decorate these with sprinkles, pastel icing, or edible glitter right after baking while they're still slightly warm, and the decorations will stick better than if you wait until they cool completely.
 Save to Pinterest
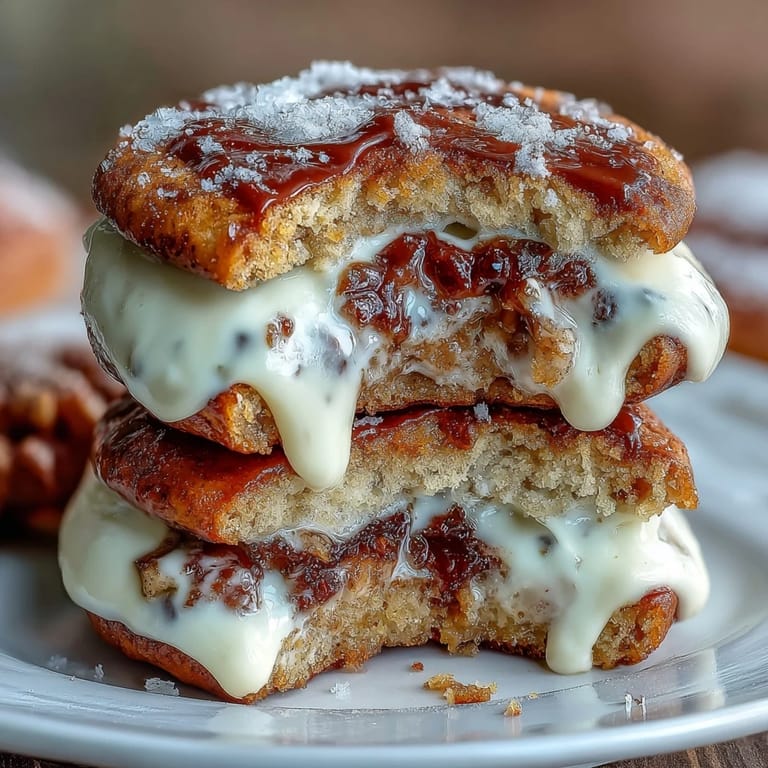
 Baking these cookies is less about following rules perfectly and more about paying attention to how the dough feels and looks, then trusting yourself to know when something is right. Share them with someone you like, and watch their face light up when they bite through the tender cookie into that smooth vanilla cream.
Recipe FAQ
- → What makes the cookies tender and soft?
The combination of softened butter, milk, and creaming the butter with sugar creates a tender and soft cookie texture.
- → Can I add flavors to the dough for variety?
Yes, adding cocoa powder or spices like cinnamon can add interesting variations to the cookie dough.
- → How should I store these sandwiches to keep them fresh?
Store them in an airtight container at room temperature; they stay fresh for up to three days.
- → What technique is best for spreading the cream filling?
Using a small spatula or piping bag ensures even and neat application of the creamy filling.
- → Can these sandwiches be made vegan or dairy-free?
Substituting butter and milk with plant-based alternatives can adapt this to vegan or dairy-free diets, though texture may vary.