 Save to Pinterest
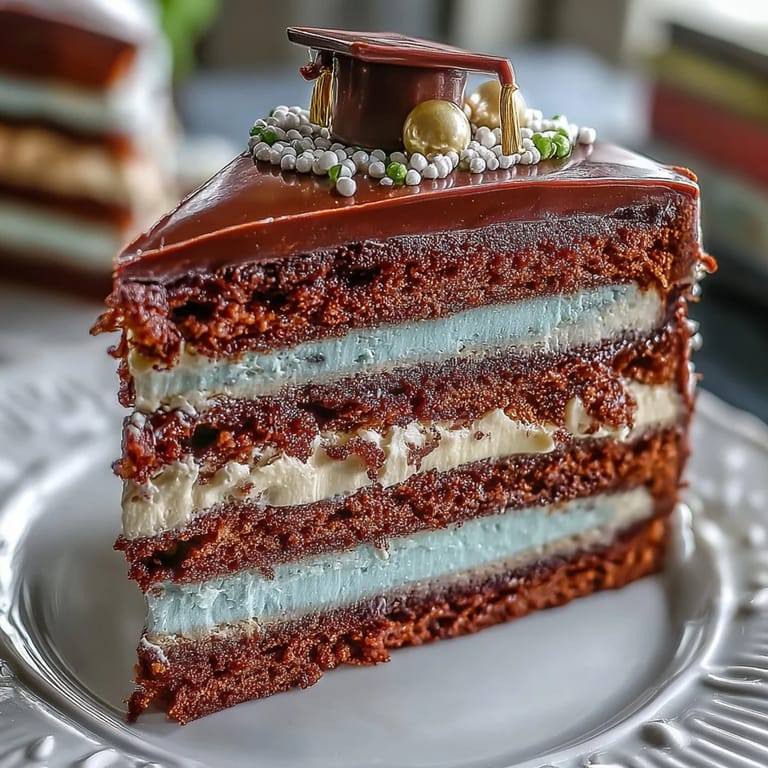
 The night my cousin texted the family group chat with her graduation announcement, I knew exactly what I wanted to make—something that would sit in the center of our kitchen table like a trophy, something that would make everyone lean in close and actually gasp before cutting into it. This ombre layer cake came together one afternoon when I realized that milestones deserve more than just sweetness; they deserve a visual story, a cake that shows the progression of color the way a graduation gown shows the progression of years. I'd watched YouTube videos of bakers creating these gradient cakes and thought, how hard could it be, but when I stood at my counter with four bowls of batter and a bottle of gel food coloring, my hands shook a little with the possibility of getting it wrong. That's when it clicked—this cake isn't just about technical skill, it's about honoring someone's achievement with something you built with your own hands.
I made this cake for my cousin on a humid Saturday afternoon, and when she walked into the kitchen and saw those four layers stacked in perfect color gradient, something shifted in her face. She pulled out her phone immediately and called her mom, and I heard her say, "You won't believe what's sitting on our counter," like I'd just handed her a piece of her own celebration on a plate. That moment felt bigger than baking—it felt like saying, without words, that we see you, we're proud of you, and you matter enough for us to spend an afternoon getting butter to the exact right temperature.
Ingredients
- All-purpose flour (3 1/4 cups): The foundation of your cake, and sifting it beforehand helps everything mix more evenly, though honestly I learned this after making a slightly dense version first.
- Baking powder (2 1/2 tsp): Non-negotiable for lift, but make sure it's fresh because old baking powder is like a broken promise—it just won't deliver the rise you need.
- Salt (1/2 tsp): A tiny pinch that somehow makes the vanilla sing louder and keeps the cake from tasting flat.
- Unsalted butter (1 cup, softened): Room temperature butter creams into sugar like magic, creating the air pockets that make this cake tender; cold butter will fight you every step of the way.
- Granulated sugar (2 cups): Beyond sweetness, the sugar is doing the heavy lifting of creating structure and that light, fluffy crumb you're after.
- Large eggs (4, room temperature): Room temperature eggs emulsify better with the butter, which might sound fancy but basically means your cake won't be greasy and will actually hold together.
- Vanilla extract (1 tbsp): The one ingredient that makes people ask what secret ingredient you used, even though it's right there on the bottle.
- Whole milk (1 1/4 cups, room temperature): Alternating wet and dry keeps the batter from breaking and helps you avoid that tough, overmixed texture that makes you want to throw the cake away.
- Gel food coloring: Use gel, never liquid food coloring, because liquid will make your batter watery and your colors will be weak and sad—gel gives you the jewel tones that make people stop scrolling on their phones.
- Egg whites (6 large, for buttercream): The base of Swiss meringue, and they need to be absolutely clean and free of even a speck of yolk or the whole thing won't whip properly.
- Granulated sugar (1 1/2 cups, for buttercream): Dissolving this over gentle heat creates a stable meringue that won't weep or collapse on you halfway through the day.
- Unsalted butter (1 1/2 cups, softened and cubed, for buttercream): Cubing it and adding it gradually prevents the buttercream from becoming a greasy, broken mess that makes you want to start over.
- Vanilla extract (2 tsp, for buttercream): A second dose of vanilla in the frosting ensures every bite carries that warmth and familiarity.
Tired of Takeout? 🥡
Get 10 meals you can make faster than delivery arrives. Seriously.
One email. No spam. Unsubscribe anytime.
Instructions
- Get your mise en place ready:
- Preheat your oven to 350°F, grease four 8-inch round pans, and line them with parchment paper—this part feels tedious but it's the difference between a cake that slides out cleanly and one that sticks to the sides like it's glued down. Bring your eggs and milk to room temperature by setting them on the counter while you prep everything else, because cold ingredients really do fight against you.
- Whisk your dry team together:
- In a medium bowl, whisk flour, baking powder, and salt until they're evenly mixed, which distributes the leavening power throughout so you don't get random dense pockets. This step takes maybe two minutes but saves you so much heartache later.
- Cream butter and sugar into fluffy clouds:
- Beat softened butter and sugar together for about 3 minutes until it looks pale and fluffy, like you could practically float on it. You'll know it's ready when you lift the mixer attachment and the mixture falls in ribbons instead of clumping.
- Introduce the eggs one at a time:
- Add eggs individually, mixing well after each one, because this helps them emulsify smoothly instead of creating a curdled mess that might make you panic a little. It's okay if the mixture looks a bit broken after the first egg—trust the process and it'll come together.
- Make the batter:
- Alternate adding the flour mixture and milk to the butter mixture, starting and ending with flour, and mix just until combined because overmixing develops gluten and makes your cake tough as a shoe. The batter should look smooth and pourable, not thick and chunky.
- Create your ombre magic:
- Divide the batter evenly into four bowls and add gel food coloring to each, starting with the lightest shade and working toward the darkest, so you build a visible gradient. Stir each one gently but thoroughly so the color is even, and don't be shy with the gel—you want colors bold enough to actually show after baking.
- Pour and bake:
- Pour each colored batter into its prepared pan, smooth the tops with an offset spatula, and slide them all into the oven where they'll bake for 22 to 25 minutes until a toothpick comes out clean. The kitchen will smell absolutely extraordinary, like vanilla and butter had a party in your oven.
- Cool with patience:
- Let the cakes cool in their pans for 10 minutes so they set slightly, then turn them out onto wire racks to cool completely, which takes about an hour and feels like it takes five. Don't skip this step or you'll have warm cake that's too fragile to handle.
- Make your Swiss meringue buttercream:
- Whisk egg whites and sugar together in a heatproof bowl set over simmering water, stirring constantly until the sugar dissolves and the mixture reaches 160°F, which takes about 5 minutes and feels like watching paint dry but is absolutely essential for food safety. You'll feel the mixture transform from gritty to silky smooth under your whisk.
- Whip until stiff peaks form:
- Transfer the warm mixture to a stand mixer and whip on high speed for about 10 minutes until it reaches stiff peaks and cools down, which sounds like a long time but this is where the magic happens. The mixture will go from frothy to thick and cloud-like, and you'll understand why people get excited about meringue.
- Add butter gradually:
- Add softened butter a few cubes at a time, mixing well after each addition, because rushing this step or using cold butter will break the emulsion and give you a grainy, sad mess. If it does break, don't panic—just keep mixing and it'll usually come back together.
- Flavor and color your frosting:
- Stir in vanilla extract and tint the buttercream with gel food coloring to match or complement your cake layers, using either the whole batch for one color or dividing it for ombre effects. This is where you get creative—you could do all one color, or split it into shades to create a rainbow of frosting.
- Trim and level your layers:
- If your cake layers have domed tops, carefully slice them off with a serrated knife so you have flat surfaces that stack evenly and don't tumble over like a tiny cake avalanche. This is the boring part but trust me, it matters.
- Stack from dark to light:
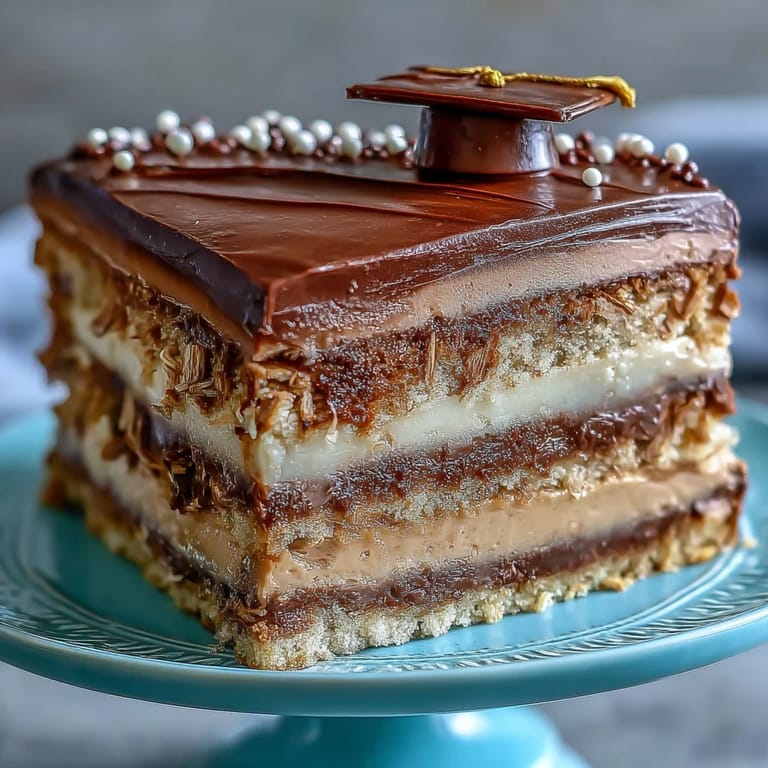
- Place your darkest layer on a cake stand, spread a generous dollop of buttercream on top, and repeat with the remaining layers in order from darkest to lightest, creating that stunning ombre effect. With each layer you add, you're basically building a small edible monument.
- Apply your crumb coat:
- Spread a thin layer of buttercream over the entire cake, like you're sealing in the crumbs, and chill for 20 minutes so this layer sets and creates a stable base for your final frosting. This step prevents crumbs from getting into your beautiful final coat.
- Frost with confidence:
- Apply your final layer of buttercream, blending colors as you go if you want an ombre effect, or keeping it simple with one solid color—either way, use an offset spatula and long strokes to smooth everything out. This is where the cake truly becomes a work of art.
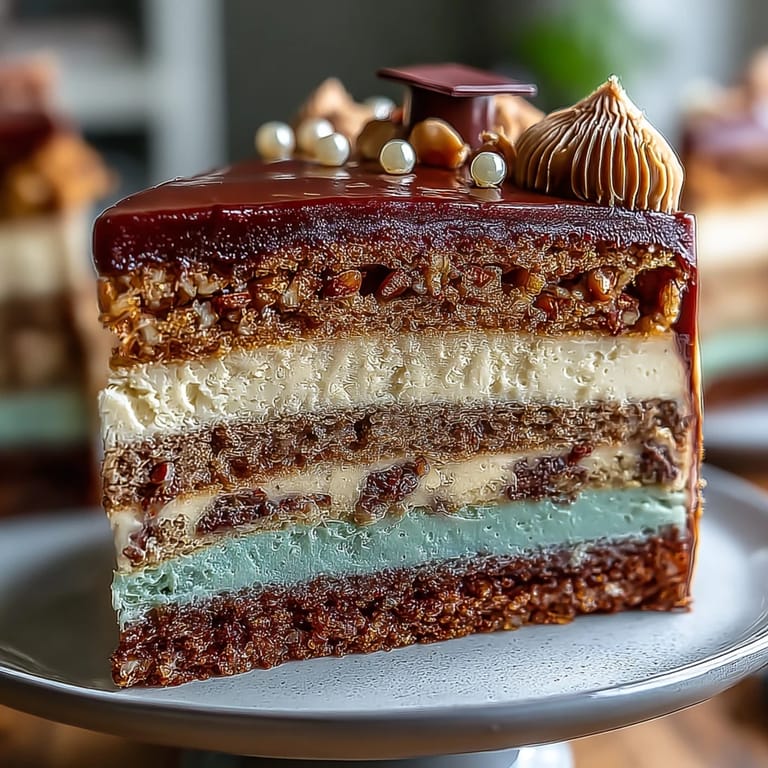
- Add your final touches:
- Decorate with edible pearls, a graduation cap topper, piped details, or whatever makes you happy, because this is your creation and it deserves to look exactly how you envision it. Let your hands guide the piping bag like it's an extension of your creativity.
- Chill and bring to temperature:
- Chill the finished cake until the frosting is set, then bring it to room temperature before serving so the flavors fully wake up and the texture is perfect. A cake served cold tastes muted; a cake at room temperature sings.
 Save to Pinterest
 My cousin wore that cake as a memory for weeks after the party, literally wearing the memory of it in her stories to friends about her graduation day. That's when I realized that baking something beautiful for someone you love is like saying, "I believe in you enough to spend time getting the small details right."
Why Gel Food Coloring Is Your Secret Weapon
The first time I made this cake, I used regular liquid food coloring because that's what I had in a drawer, and the ombre effect looked more like watercolor that had been left in the rain. My friend Sarah came over and said, "It tastes incredible but it looks kind of sad," which was the gentle truth I needed to hear. I invested in gel food coloring for the second attempt, and suddenly the same cake looked like something you'd see in a bakery window, with colors so rich and bold they almost glowed.
The Swiss Meringue Buttercream Moment
Making Swiss meringue buttercream feels like performing a small miracle in your kitchen because you're essentially turning egg whites and sugar into fluffy clouds by heating them to exactly the right temperature, then whipping air into them until they transform. The first time you pull your mixer away and see stiff peaks stand at attention, you'll understand why bakers get emotional about their craft. This frosting is more stable than American buttercream, tastes less sweet, and creates a silky, professional finish that makes the cake look like you went to baking school.
Layering and Color Flow Tips
Building this cake is like creating a small edible rainbow, and the key is arranging your layers from darkest to lightest so the color gradient reads clearly when you slice into it. I made the mistake on my first attempt of putting them in random order, and when we cut the cake, the color story didn't flow smoothly—it was a valuable lesson in thinking about the visual journey. Working with room temperature buttercream makes spreading so much easier because cold frosting fights back and can tear the cake layers, whereas soft frosting glides on like butter (because it basically is).
- Stack your darkest layer first so the gradient builds visibly from bottom to top.
- Use an offset spatula and let the weight of the tool do the work instead of pressing hard and tearing the cake.
- If frosting warms up too much while you're working, pop the cake in the fridge for 15 minutes to reset and keep working.
 Save to Pinterest
 This cake teaches you something important about celebration—that the effort you put in, the care with which you layer and frost, becomes part of the gift itself. It's not just about feeding someone, it's about saying with your hands what's sometimes hard to say with words.
Recipe FAQ
- → How do I achieve the perfect ombre effect in the layers?
Divide the batter evenly into multiple bowls, then add increasing amounts of gel food coloring to each. This gradual color increase creates a smooth and striking ombre gradient when baked.
- → What’s the best way to make Swiss meringue buttercream silky?
Whisk egg whites and sugar over simmering water until sugar dissolves, then whip to stiff peaks before gradually adding softened butter. Maintaining the right temperature and mixing speed is key to a smooth texture.
- → Can I prepare the cake layers in advance?
Yes, bake the layers ahead and keep them wrapped and refrigerated. Bring them back to room temperature before assembling and frosting for the best texture.
- → How should I store the finished layered cake?
Store the assembled cake covered in the refrigerator to maintain freshness and set the buttercream. Bring to room temperature before serving for optimal flavor and texture.
- → What decorations complement this ombre style cake?
Edible gold or silver pearls and themed toppers such as caps or diplomas add festive elegance without overpowering the delicate gradient effect.