 Save to Pinterest
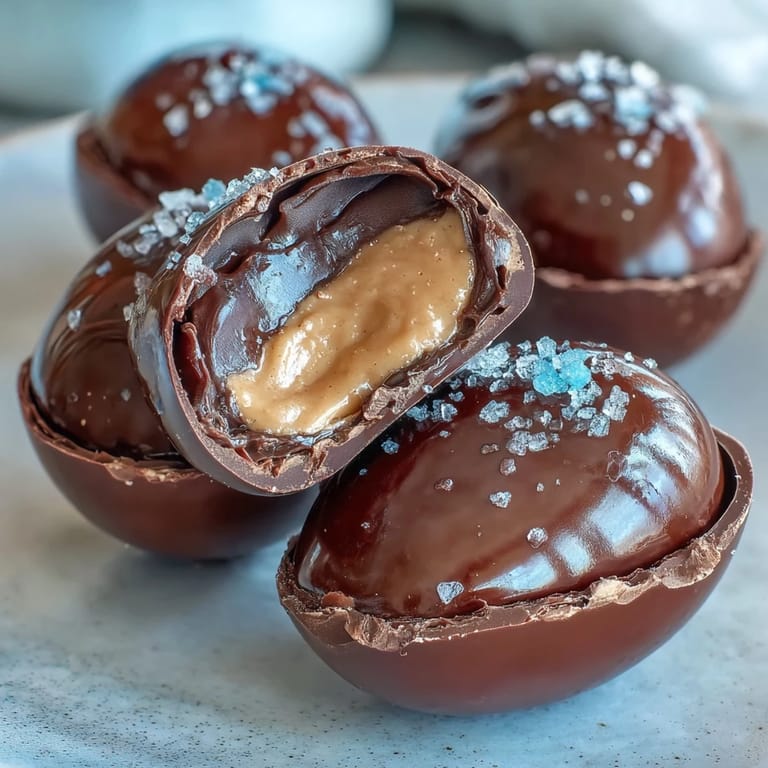
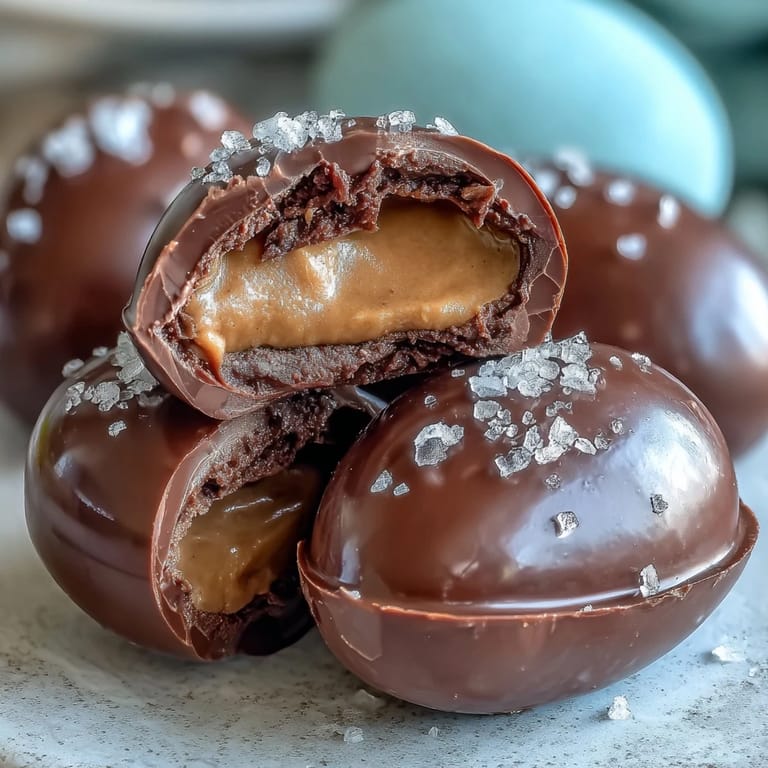
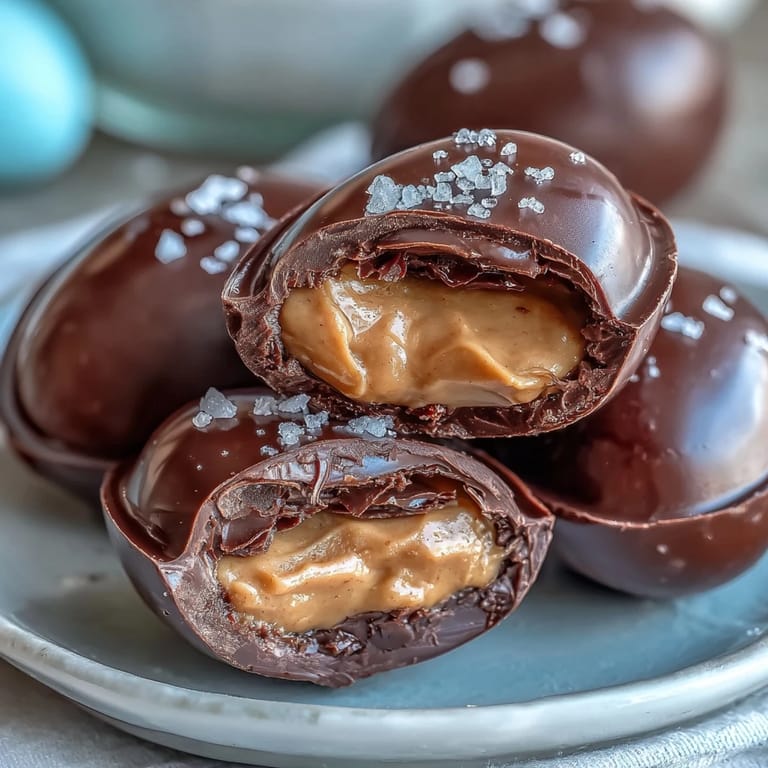
 The first time I made these Dark Chocolate Peanut Butter Easter Eggs, I found myself trying to squeeze in some cheerful kitchen therapy before the family descended for our annual spring gathering. The peanut butter’s scent mingling with the deep, toasty perfume of melting chocolate was all it took to put a grin on my face. There’s something incredibly satisfying about shaping soft, sticky centers and sneaking a taste of the mixture before dipping. My hands always end up a glossy, chocolatey mess, and for once, it feels like part of the joy rather than a chore. These treats have become my go-to way to make the holidays a little more playful—and a lot more delicious.
One year, I gathered some friends for an impromptu treat-making session just before Easter. There was laughter over who could shape the ‘perfect egg’ and at least one argument about who got to lick the spoon after the last batch. Everyone left with sticky fingers and a box of homemade eggs that never made it home intact. I still get messages asking when the next batch will be ready.
Ingredients
- Creamy peanut butter: Use your favorite brand—make sure it’s not too oily or dry, because consistency is everything for a smooth center.
- Unsalted butter: Softened butter makes blending easier and keeps the filling silky; don’t try melting it fully or you’ll lose that creamy texture.
- Powdered sugar: Not only does it sweeten, but it also thickens the peanut butter so they hold their shape perfectly.
- Pure vanilla extract: The tiniest splash makes a big difference in flavor depth, so don’t skip this, even if you’re tempted.
- Fine sea salt: Just a pinch intensifies both the peanut and chocolate flavors—I've learned coarse salt doesn’t mix in as smoothly here.
- Dark chocolate (60–70% cocoa): Look for a high-quality bar or chips—you want a chocolate that snaps when chilled and balances the sweetness inside.
- Coconut oil: Optional, but it makes the chocolate coating glossier and easier to work with; if you like a sturdier shell, leave it out.
- Flaky sea salt: That final sprinkle is more than garnish—it adds crunch and a little drama to each bite.
Tired of Takeout? 🥡
Get 10 meals you can make faster than delivery arrives. Seriously.
One email. No spam. Unsubscribe anytime.
Instructions
- Prep your tray:
- Line a baking sheet with parchment paper, making sure it covers the edges to prevent sticky surprises later.
- Mix the peanut butter base:
- Combine peanut butter, softened butter, powdered sugar, vanilla, and a pinch of salt in a bowl. Stir and mash until it’s thick, cohesive, and you can almost feel how smooth it’ll be to bite.
- Shape your eggs:
- Scoop up a couple of tablespoons and mold the mixture right in your hands—I like aiming for that imperfect, hand-crafted look.
- Chill out:
- Set the eggs on your lined sheet and pop them in the freezer for about 30 minutes—this stops them melting when dipped in chocolate.
- Melt the chocolate:
- Gently melt dark chocolate with coconut oil (if using), either over simmering water or in the microwave. Stir until it’s glossy and completely smooth, inhaling that rich aroma as it transforms.
- Dip and set:
- Drop a cold egg into the melted chocolate and roll it around with a fork, letting excess drip away before placing it back on the tray.
- Sea salt sprinkle:
- Sprinkle flaky salt over each egg as soon as you set it down so it sticks while the shell is wet.
- Final chill:
- Refrigerate eggs for at least 15 minutes, or until the chocolate is firm enough to tap.
 Save to Pinterest
 There was a moment last spring when my nephew bit into one of these eggs, eyes going round with delight as chocolate flecked his cheeks. Right there at the crowded holiday table, the eggs became not just dessert, but the highlight everyone talked about long after crumbs were gone.
Simple Swaps & Make-Ahead Tips
If you want to mix things up, a textured peanut butter gives these eggs a little crunch, and swapping coconut oil for vegetable oil doesn’t change the shine. You can also prep the peanut butter centers days ahead; just freeze, then dip in chocolate when you're ready for a fresh batch. I once tried adding a tablespoon of maple syrup for a different sweetness—it worked, but made the filling stickier, so use a lighter touch if you opt for extra flavor.
Storing and Serving Suggestions
Stack the finished eggs between layers of parchment in an airtight container and stash them in the fridge if you want them to stay firm. For gifting, wrap each egg in foil or wax paper—it gives a cheerful pop when you open your treat box. They’re excellent straight from the fridge but taste just as dreamy if left out at room temp for a little while, as the filling softens just enough.
Common Pitfalls & Quick Fixes
The chocolate can sometimes seize if a drop of water sneaks in, so make sure everything is dry before melting. If you accidentally make the filling too loose, a little extra powdered sugar fixes things nicely. On a humid day, I once had the chocolate take forever to set—tucking the tray in the freezer for an extra ten minutes did the trick every time.
- Shaping gets easier with cold hands.
- Sprinkle the salt as soon as you dip so it sticks well.
- Don’t worry if your eggs aren’t perfect—they’ll still taste fantastic.
 Save to Pinterest
 I hope these chocolate peanut butter eggs bring laughter and a little messiness to your kitchen too. Just a warning—once you share them, you’ll be asked for the recipe every Easter.
Recipe FAQ
- → Can I use milk chocolate instead of dark chocolate?
Yes, milk chocolate can be substituted for a sweeter, creamier coating, depending on your preference.
- → What type of peanut butter works best?
Creamy peanut butter creates a smooth filling, but crunchy peanut butter can add extra texture if desired.
- → Is coconut oil necessary for the chocolate coating?
Coconut oil helps create a glossier, smoother shell but can be omitted or swapped with vegetable oil.
- → How do I make the eggs gluten-free?
Ensure all ingredients, especially chocolate and powdered sugar, are certified gluten-free for safety.
- → How should these be stored?
Store in an airtight container in the refrigerator for up to one week, or freeze for longer shelf life.
- → Can butter be replaced with a dairy-free option?
Yes, plant-based butters or margarine work well if you wish to make the treat dairy-free.