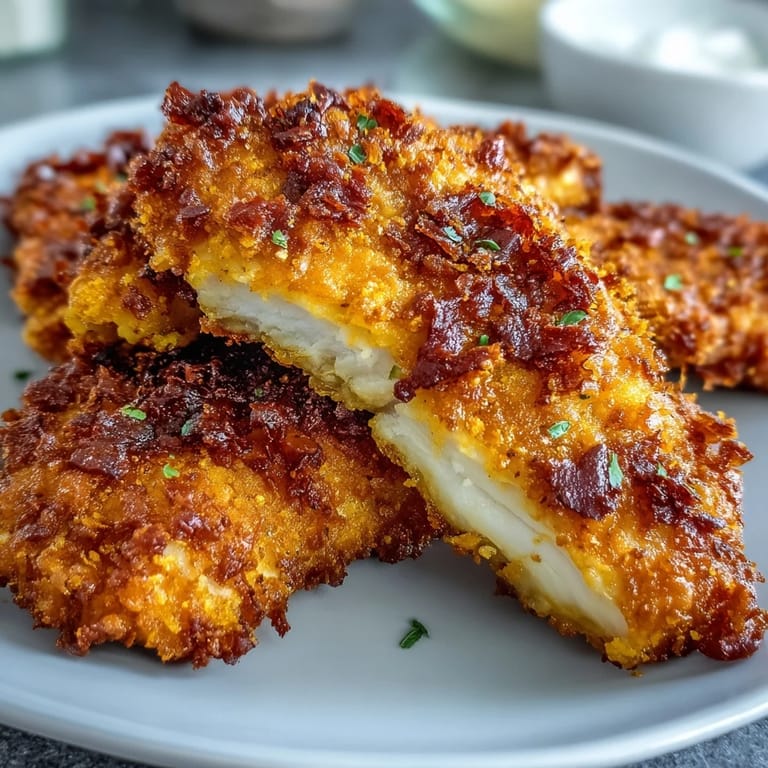
Save to Pinterest
 My daughter came home from a friend's house raving about golden chicken fingers that tasted nothing like the frozen ones we used to buy. After some persistence, I got the secret: turmeric. I grabbed a jar from the back of my spice cabinet, dusted off the lid, and gave it a shot that very evening. The kitchen smelled like a warm spice market, and those tenders came out crispy, golden, and utterly different from anything I'd made before.
I made these for a birthday party once, and they disappeared faster than the cake. One friend asked if I'd ordered them from a restaurant. Another admitted she didn't even like chicken tenders but couldn't stop eating these. I realized then that this recipe had earned its place in my regular rotation.
Ingredients
- Boneless, skinless chicken tenders or chicken breast (600 g): Tenders are ideal because they're already the right size, but sliced chicken breast works just as well and is often cheaper.
- Plain yogurt (2 tablespoons): This tenderizes the chicken and helps the spices cling; I've used Greek yogurt and even a dairy-free coconut version with great results.
- Olive oil (1 tablespoon for marinade, spray or 3 tablespoons for cooking): Adds richness to the marinade and helps achieve that crispy exterior when baking or frying.
- Ground turmeric (2 teaspoons for marinade, 1 teaspoon for breading): The star ingredient that gives these their vibrant color and subtle earthy flavor.
- Ground cumin (1 teaspoon): Brings a warm, slightly nutty depth that balances the turmeric beautifully.
- Garlic powder (1 teaspoon): I prefer powder here because it distributes evenly and doesn't burn like fresh garlic can.
- Smoked paprika (1 teaspoon): Adds a gentle smokiness that makes people ask what your secret ingredient is.
- Black pepper (½ teaspoon in marinade, ½ teaspoon in breading): A little heat and bite that wakes up all the other spices.
- Salt (¾ teaspoon in marinade, ½ teaspoon in breading): Essential for bringing out every layer of flavor.
- Panko breadcrumbs (120 g): These Japanese-style breadcrumbs stay crunchier than regular ones, and I won't go back.
- All-purpose flour (60 g): Helps the coating stick and adds structure to the crust.
Tired of Takeout? 🥡
Get 10 meals you can make faster than delivery arrives. Seriously.
One email. No spam. Unsubscribe anytime.
Instructions
- Marinate the chicken:
- Whisk together yogurt, olive oil, turmeric, cumin, garlic powder, paprika, black pepper, and salt in a bowl until smooth. Toss the chicken strips in the marinade until every piece is coated, then let them sit for at least 15 minutes, or up to 2 hours in the fridge if you have the time.
- Preheat your cooking method:
- If baking, set your oven to 220°C (425°F) and place a wire rack on a baking sheet. If frying, heat about 3 tablespoons of neutral oil in a large skillet over medium-high heat until it shimmers.
- Prepare the breading:
- In a shallow dish, mix together panko breadcrumbs, flour, turmeric, salt, and pepper. The second dose of turmeric in the breading intensifies the color and flavor.
- Coat each piece:
- Take each marinated chicken strip and press it into the breadcrumb mixture, turning to coat all sides. Press gently so the coating really sticks.
- Bake or fry:
- For baking, arrange the coated strips on the wire rack, spray lightly with oil, and bake for 18 to 20 minutes, flipping halfway through until golden and cooked through. For frying, work in batches and cook each strip for 3 to 4 minutes per side until crispy and fully cooked, then drain on paper towels.
- Serve immediately:
- These are best enjoyed hot, with your favorite dipping sauce on the side.
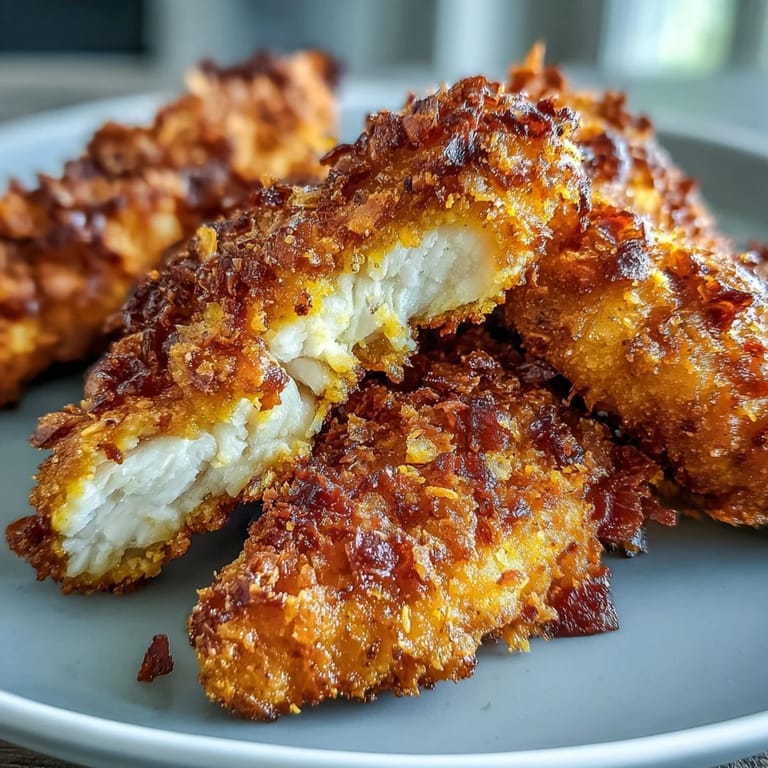
 Save to Pinterest
 One evening, my son asked if we could have these instead of pizza for dinner. That's when I knew this recipe had become more than just another weeknight option. It had become something my family actually requested, something that made the kitchen feel a little more like home.
Making Them Your Own
I've played with this recipe more times than I can count. Once I added a pinch of cayenne when my sister visited, and she loved the extra kick. Another time I ran out of panko and used crushed cornflakes, which turned out surprisingly well. If you need them gluten-free, swap the flour and breadcrumbs for gluten-free versions and you won't lose any of the crunch.
What to Serve Alongside
These tenders pair beautifully with a simple cucumber salad, roasted sweet potato wedges, or even just a big pile of steamed broccoli. For dipping, I usually make a quick yogurt-herb sauce with fresh dill and lemon juice, but sweet chili sauce or even plain ketchup works if you're feeding picky eaters. Sometimes I toss together a quick slaw with lime and cilantro, and that freshness cuts through the richness perfectly.
Storage and Reheating
Leftovers keep well in the fridge for up to three days in an airtight container. I've learned the hard way that microwaving them turns the coating soft and sad. Instead, reheat them in a 200°C (400°F) oven for about 8 minutes, or use an air fryer if you have one. They come back almost as crispy as when they were fresh.
- Store cooled tenders in a single layer to prevent them from steaming each other.
- Freeze them on a baking sheet first, then transfer to a freezer bag for up to a month.
- Reheat frozen tenders straight from the freezer in the oven, adding a few extra minutes to the time.
 Save to Pinterest
 These tenders have become my go-to whenever I need something reliable, flavorful, and a little bit special. I hope they bring as much joy to your table as they have to mine.
Recipe FAQ
- → Can I make these chicken tenders ahead of time?
Yes, you can marinate the chicken up to 2 hours in advance for deeper flavor. You can also bread the tenders and refrigerate them for up to 4 hours before cooking. For meal prep, cook them fully and reheat in the oven or air fryer to maintain crispiness.
- → What's the best way to keep the tenders crispy?
For baking, place the tenders on a wire rack over a baking sheet to allow air circulation. Lightly spray with oil before baking. If frying, drain on paper towels and avoid stacking them. Reheat leftovers in the oven or air fryer rather than the microwave.
- → Can I use chicken breast instead of tenders?
Absolutely. Cut boneless, skinless chicken breasts into even strips about 1-inch wide. This ensures they cook evenly and remain tender. Adjust cooking time if the pieces are thicker than standard tenders.
- → How do I make these gluten-free?
Substitute the all-purpose flour with rice flour or gluten-free flour blend, and use certified gluten-free breadcrumbs or crushed cornflakes in place of panko. The flavor and texture will remain delicious.
- → What dipping sauces pair well with turmeric chicken tenders?
These tenders pair beautifully with yogurt-herb dip, tzatziki, sweet chili sauce, honey mustard, or garlic aioli. The warm spices complement both creamy and tangy sauces perfectly.
- → Can I air fry these chicken tenders?
Yes, air frying works wonderfully. Preheat your air fryer to 200°C (400°F), arrange tenders in a single layer, spray lightly with oil, and cook for 12-15 minutes, flipping halfway through until golden and cooked through.